Headgear

I’ve got hold of some more bits and pieces for my head. As well as the existing mask, I have now added:

  • A hose to connect the mask to the re-breather unit – one of those russian rubber ones which was a couple of quid on fleabay.
  • Plastic 90 degree bend to attach hose to re-breather – couple of quid from my local DIY store. It’s a 40mm plastic waste fitting.
  • Airsoft half-skull face-mask (again, a couple of quid) – this’ll sit over the gas mask with some mods. I’ll also be able to remove parts of the gas mask that’ll be hidden, this’ll allow some breathing holes and hopefully stop  the eye lens misting up.
  • A replica German M35 helmet – this didn’t cost as I managed to persuade someone to get it as an xmas present. But it’s about £40-£50.

IMG_1326

Carapace Armour Painted

The carapace armour has had an undercoat of satin black paint, maybe I should have used a matt. Aquila and skulls on the chestplate and shoulders has been given the same paint job as the skulls on the collar insignia of the greatcoat.
The paint scheme for them is that from the ‘Eavy Metal Masterclass, Demon Prince brass armour trim guide.

The breastbones were attached to the chestplate with hot glue and then painted using a Games Workshop skull colour painting guide. There are a few bits to finish-off and then I’ll weather the armour and start on the rebreather unit to sit on the back of the backplate. I think I’ll vacuum form that to minimise the weight.

12348090_10153941446099610_8302072929568373405_n

Carapace Armour Pre-Paint

This is the carapace and shoulder armour almost done. I couldn’t wait to photograph further fine tuning before applying the first undercoat, so this is the only pic prior to undercoating.
Since this pic I have finished-off the rib-cage decoration. I have also:
Cut and shaped the bottom of the chest plate..
Added mock rivets to chest and back plate.
Added aquila to the  shoulder guard.
Added Skulls to the rere-brace.

I’ll post some more pics when the paint job is underway.
IMG_0714

Carapace Armour Gorget

It wasn’t easy, but after a lot of messing around I have attached a gorget to the breastplate. It isn’t right however. On trying it on I found that the front part is angled to low and the aquila that will go on it will not be seen very well. It also doesn’t look like the one on the figure I’m using as a guide. So, that is going to get a bit of a mod.

IMG_0705

Carapace Armour Decoration

I have racked my brains to work out what to use for the rib-cage feature on the front of the carapace armour. There are quite a few tutorials online on how to make something like that, but I wasn’t too happy going down that route.
I did find a great latex one for sale on the web, but nowhere seemed to be in stock and it looked like the manufacturer no longer produced it. But I eventually found one for sale and here it is.

image_3368 (1)

I’m unsure about the colour scheme on it, my inspiration for the costume – the painted figure in another post – has the rib-cage (and face-mask) as white. Maybe that’s the way ahead?

Carapace Armour

Moving on to the carapace armour. I thought it might be relatively simple to do, but that’s not the case!
Two pieces – chest and back plate with an integral bevor/collar. On the chest piece is a mock rib-cage and on the bevor, an Imperial Aquila. That didn’t sound too difficult until I started to use Worbla for the first time. I discovered my thermoplastic skills are gash. I’ve used craft foam between Worbla sheets which was ok when initially cut-out.

IMG_0684But then I don’t know if I’m using it properly, it hasn’t seemed to have stuck to the foam layer and once I shaped it there were bubbles galore and quite a bit of distortion.

IMG_0695
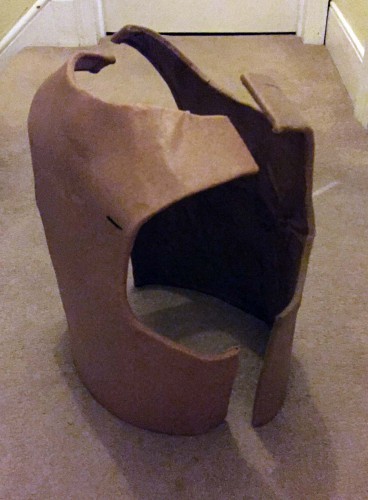
The chest piece is the worst, but that will be hidden by the rib-cage.

Anyway, all suggestions greatly received – more work to do I reckon

More Buttons

This is the button model, the mould and the cast results. Also you can see the cut-down skull ornaments I found which will go on the greatcoat collar. All items now need to be painted in a brass effect scheme.

IMG_0664

Greatcoat buttons

As you can see the greatcoat buttons are cheap and plain. I want skull motif buttons and after searching around (should have used the skulls that I put on the laspistol!) I found another plastic skull from my sons toy pirate ship. It is not ideal due to the ‘snarling’ expression, but it’ll suffice.
Next step to finish modelling the button before casting.

FullSizeRender-2

Greatcoat

So here is the greatcoat being worn. You can see that the sleeves are too short for my gorilla arms, as is the length. It needs to be mid-calf. The collar is also too low and needs to be stiffened.

_DSF0968

So, I removed the collar entirely and made a replacement which has a layer of calico and bondaweb inside to stiffen it. I also added a regimental flash to the left collar.

IMG_0634-2